

Understanding the Bidirectional Structure of Ledger Lines
At their core, XRPL trust lines are recorded as a bidirectional RippleState entry in the ledger [1]. This relationship connects two specific accounts, tracking a shared balance between the addresses [1]. This balance is positive from one perspective and negative from the other, which is typically the issuing entity [1]. You can only receive a token after creating this pathway, meaning no one can drop random assets into your wallet [1].
Each line is established for a single, specific currency code, meaning you can have multiple lines between the same accounts for different assets [1]. For example, if you want to hold both RLUSD and USDC from different issuers, you will have distinct lines [1]. Each side can control its own settings, such as limits that prevent balances from exceeding a chosen amount [1].
To establish this pathway, an account must submit a specific TrustSet transaction with a non-zero limit [1][3]. While this is usually done manually, some other transactions can also create a line automatically [1]. To delete a trust line and remove its owner reserve, you need to use a TrustSet transaction to set your settings to default and offload any positive balance you have on that line [1]. Once the balance is zero, the ledger deletes the entry [1].
Ledger Reserves and the Cost of Storing Objects
Because every ledger entry occupies physical storage space, the network charges a reserve fee to prevent spam [2]. The ledger's reserve rules apply directly to XRPL trust lines because they occupy space on the ledger [1][2]. The network requires accounts to maintain a minimum amount of native XRP, which is split into two components [2]. Every address must maintain a minimum quantity of XRP in the shared global ledger to establish an account [2].
The second component is the owner reserve, requiring an additional 0.2 XRP for every object your address owns [2]. These objects include checks, escrows, and each active ledger line you establish to hold stablecoins [2]. When you set up a line to get a token, 0.2 XRP of your balance is locked [1][2].
But a special rule lets you get your first two lines for free under some conditions [1]. If your address owns two or fewer items, your owner reserve is treated as zero, letting you establish these pathways without holding extra XRP [1][2]. Understanding these reserve mechanics is vital for anyone planning to receive crypto or manage stablecoins.
If you need to check how many items your address owns, you can call the account_info method to find your OwnerCount [2]. You then multiply this number by the 0.2 XRP owner reserve and add the 1 XRP base reserve to calculate your total reserve requirement [2]. If fees drop your balance below this limit, you cannot open new lines or send XRP [2].
How Token Issuers Enforce Controls and Freezes
To manage non-native assets, issuers and regular accounts can choose to freeze trust lines to restrict how those tokens are utilized [1]. No one can freeze XRP. But issuers can freeze other tokens to follow the law [4]. An issuer can use an individual freeze to target a single counterparty to halt their transfer ability [4]. Under this freeze, you can still send tokens back to the issuer [4].
For stricter situations, issuers can employ a deep freeze, which prevents the targeted address from even receiving those tokens [1][4]. Alternatively, a global freeze can be enabled on an issuer's account, halting all transfers for all counterparties [4]. These freeze rules apply regardless of whether your balance is positive or negative [4]. While these controls are essential for compliance, they highlight why choosing highly regulated issuers is crucial.
To reassure holders, some issuers use a setting called No Freeze, which permanently gives up their ability to freeze individual accounts [4]. Once enabled, they can never freeze a specific user's tokens, although they can still activate a global freeze [4]. Checking these freeze policies can help you assess the overall safety of your assets. You can read more about stablecoin safety in our article is USDC safe to understand this landscape.
Ripple USD and Its Compliance Standards
Ripple USD, known as RLUSD, is designed to maintain a stable value of exactly one US dollar [5]. Unlike other assets, RLUSD is backed by a fully segregated reserve of cash and cash equivalents, which is held in segregated accounts at depository institutions [5]. In July 2025, Ripple chose BNY Mellon to hold these assets with top-grade security [5]. This backing ensures that every token can be redeemed one-to-one [5].
To meet top rules, RLUSD comes from a trust chartered by the New York State Department of Financial Services [5]. To maintain transparency, the issuer publishes monthly third-party attestations of its reserves, ensuring that the outstanding supply is always backed 100% by highly liquid, short-term assets [5].
Because of its compliance-focused design, RLUSD is highly suited for near-instant cross-border payments and corporate treasury management [5]. It integrates the stability of the dollar with the speed of blockchain technology, settling transactions in seconds with low network costs [5]. See RLUSD vs USDC on the XRP Ledger to compare your choices on this network.
In addition to strict reserve backing, the stablecoin is designed to support institutional needs. For instance, payment service providers can use it to access new markets with a highly secure asset [5]. Global settlement systems can use it to simplify their treasury operations [5]. Because it settles in seconds on the XRP Ledger with low network costs, it offers a reliable alternative to traditional banking networks [5]. This makes it a powerful tool for businesses that require speed, compliance, and absolute transparency [5].
Setting Up an RLUSD Trust Line in SpendTheBits
To hold RLUSD on the XRP Ledger, you must first set up a trust line with the issuer [1][5]. This means you will need to submit a TrustSet transaction to configure the ledger line [1][3]. We must note that setting up XRPL trust lines raises your account's owner reserve by a small increment [1][2]. This will require your account to allocate the standard owner reserve of 0.2 XRP, unless it falls under the free line exception [1][2].
In SpendTheBits, RLUSD and USDC on the XRP Ledger are live. Open Receive and choose the asset, and the app offers to set up the trust line for you. Once it is in place, you can see your balance, receive, and send. For a wider view of safe storage, read our guide to self-custody stablecoins.
Every transaction in SpendTheBits, including the TrustSet, is signed directly on your device, and our backend never sees your private keys. A non-custodial wallet keeps you in full control of your crypto. To understand the core differences in custody models, you can read our guide on what is a non-custodial wallet.
Keep enough XRP for the reserve before you add a line, since each line adds the owner reserve on top of the base reserve [2]. Our backend only sets up the unsigned transaction for your ledger line. Your device signs it and pays the small network fee in XRP. If a line is no longer useful, send its balance back to zero and remove it to release the reserve [1]. This keeps your keys private and gives you total control of your stablecoins.
More You Can Do in the Same Wallet
Beyond the XRP Ledger, this non-custodial wallet works on many chains. You can hold, send, and bridge assets on Bitcoin, Ethereum, Base, and Solana. If you want to bridge assets between chains seamlessly, you can use our built-in bridge powered by Circle CCTP. We charge a small bridge fee, under 1%, for this service, which is always shown transparently before you confirm your transfer.
Additionally, you can put your idle stablecoins to work using our live Earn feature. This tool sends your stablecoins to safe vaults like Aave and Morpho. You can track your real market yield. We take a small fee when you withdraw. We skip the fee if gas costs are too high. This keeps your main deposit safe. It is a very smart way to handle your assets.
SpendTheBits is a self-custody wallet. It creates and keeps your seed phrase only on your own device. By keeping your private keys on your own device, you ensure that no third party can freeze or mismanage your assets.
In the app · 4 steps
Hold RLUSD on the XRP Ledger from SpendTheBits
A trust line is the one step that makes an issued currency show up in your wallet. Here is where it lives in the app.
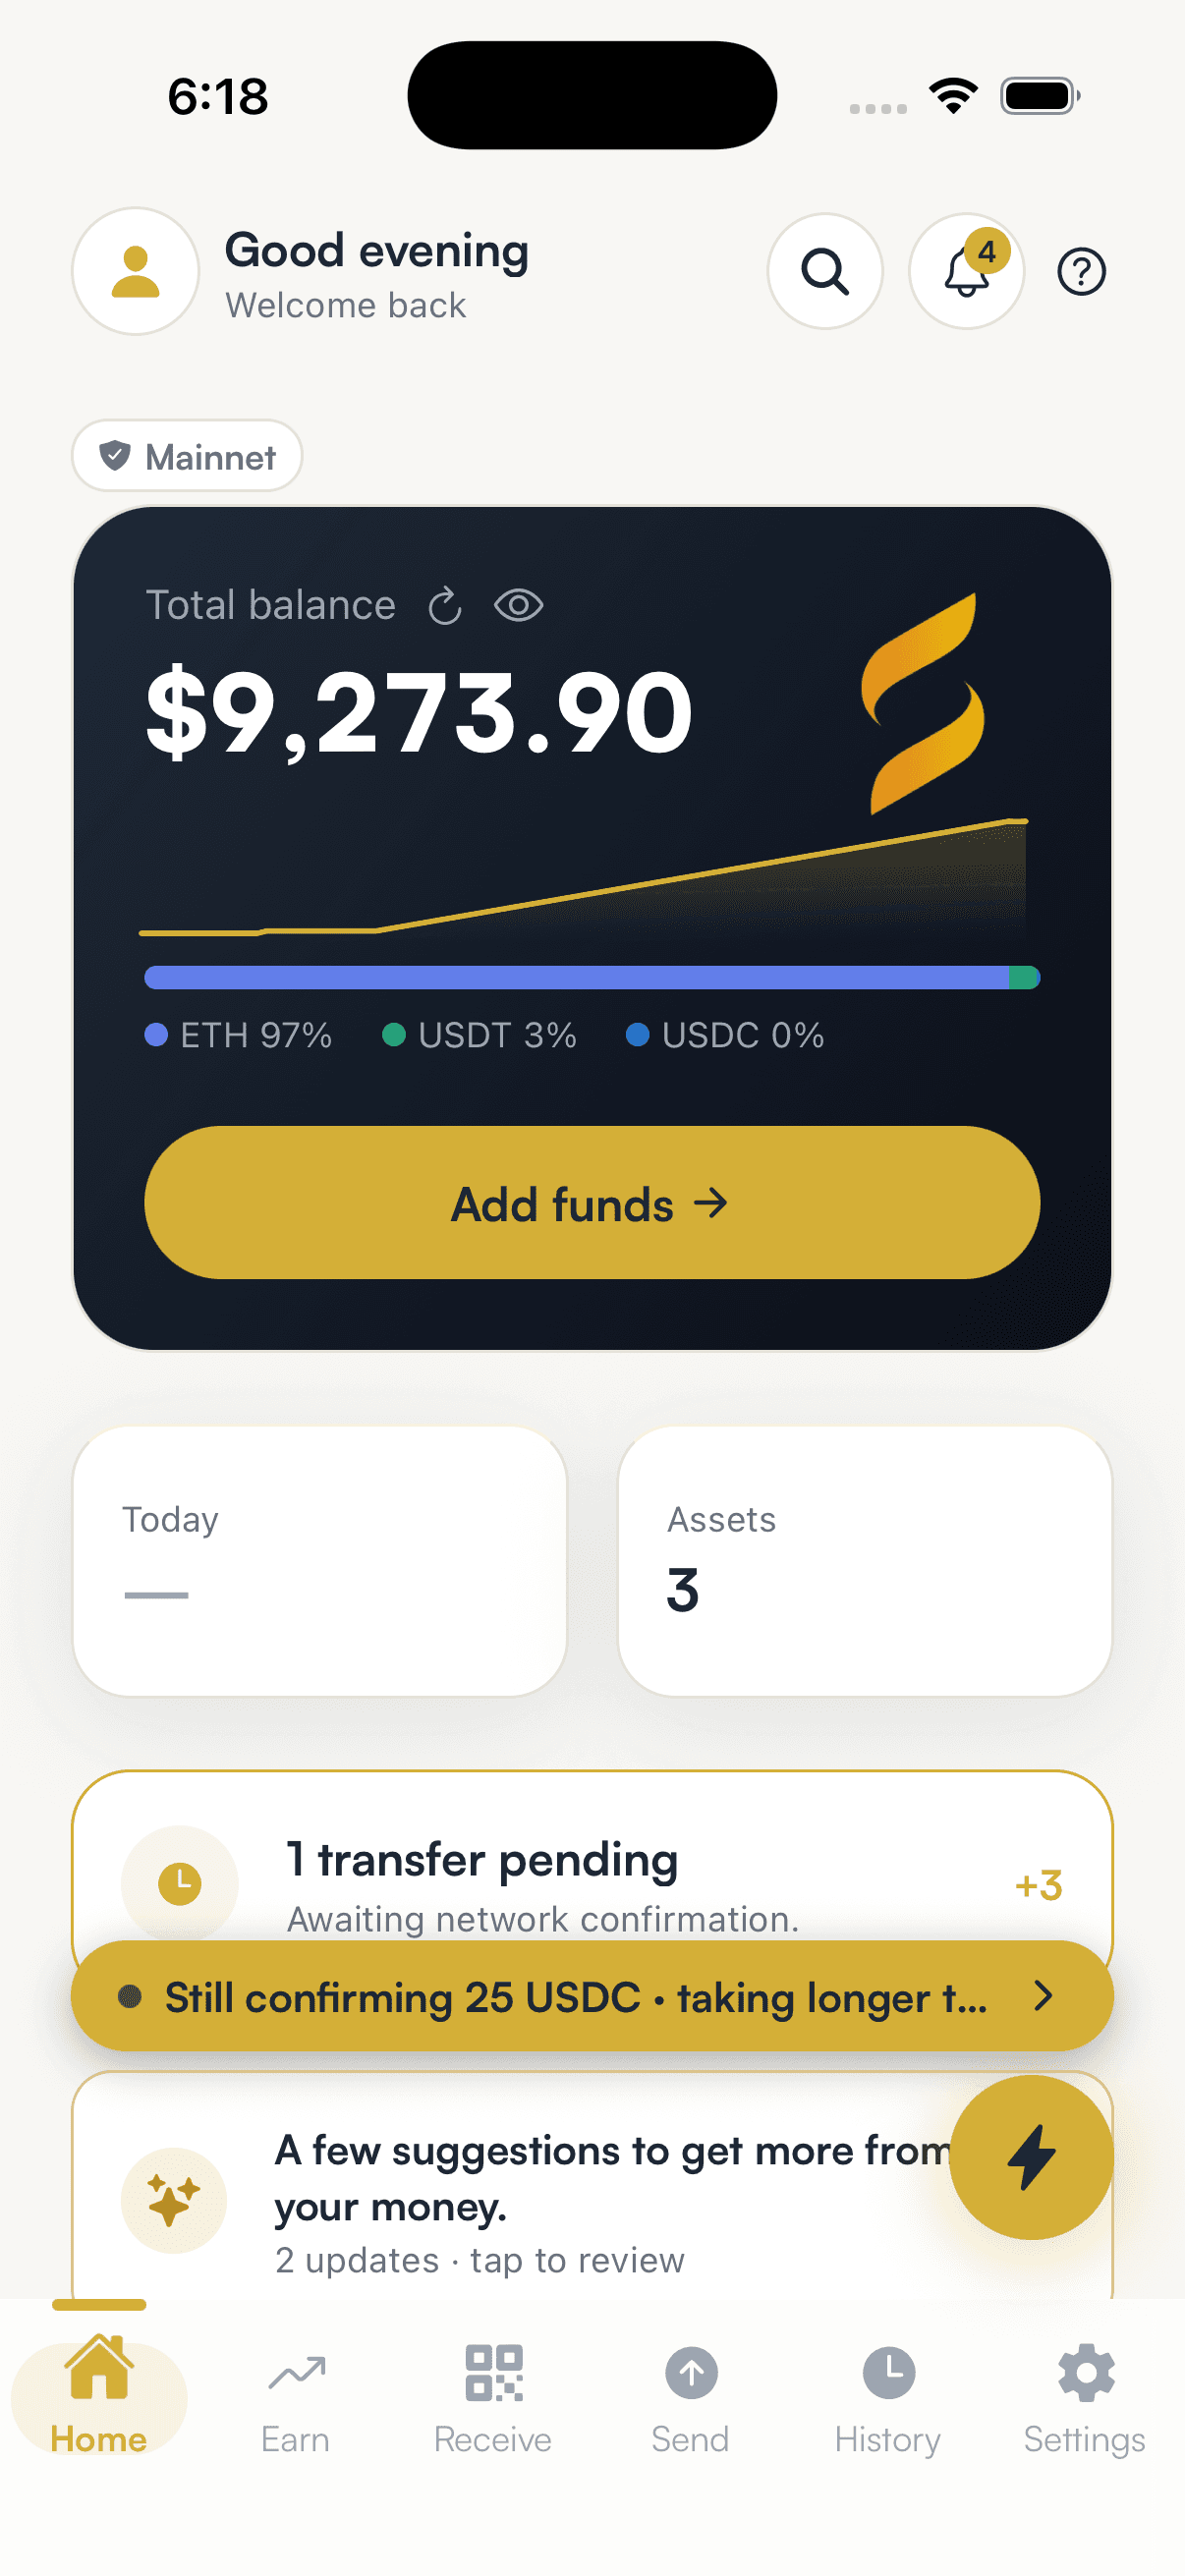
Open the asset list
Your XRP balance and any issued currencies you hold sit together, so you can see what the account is carrying before you add anything.
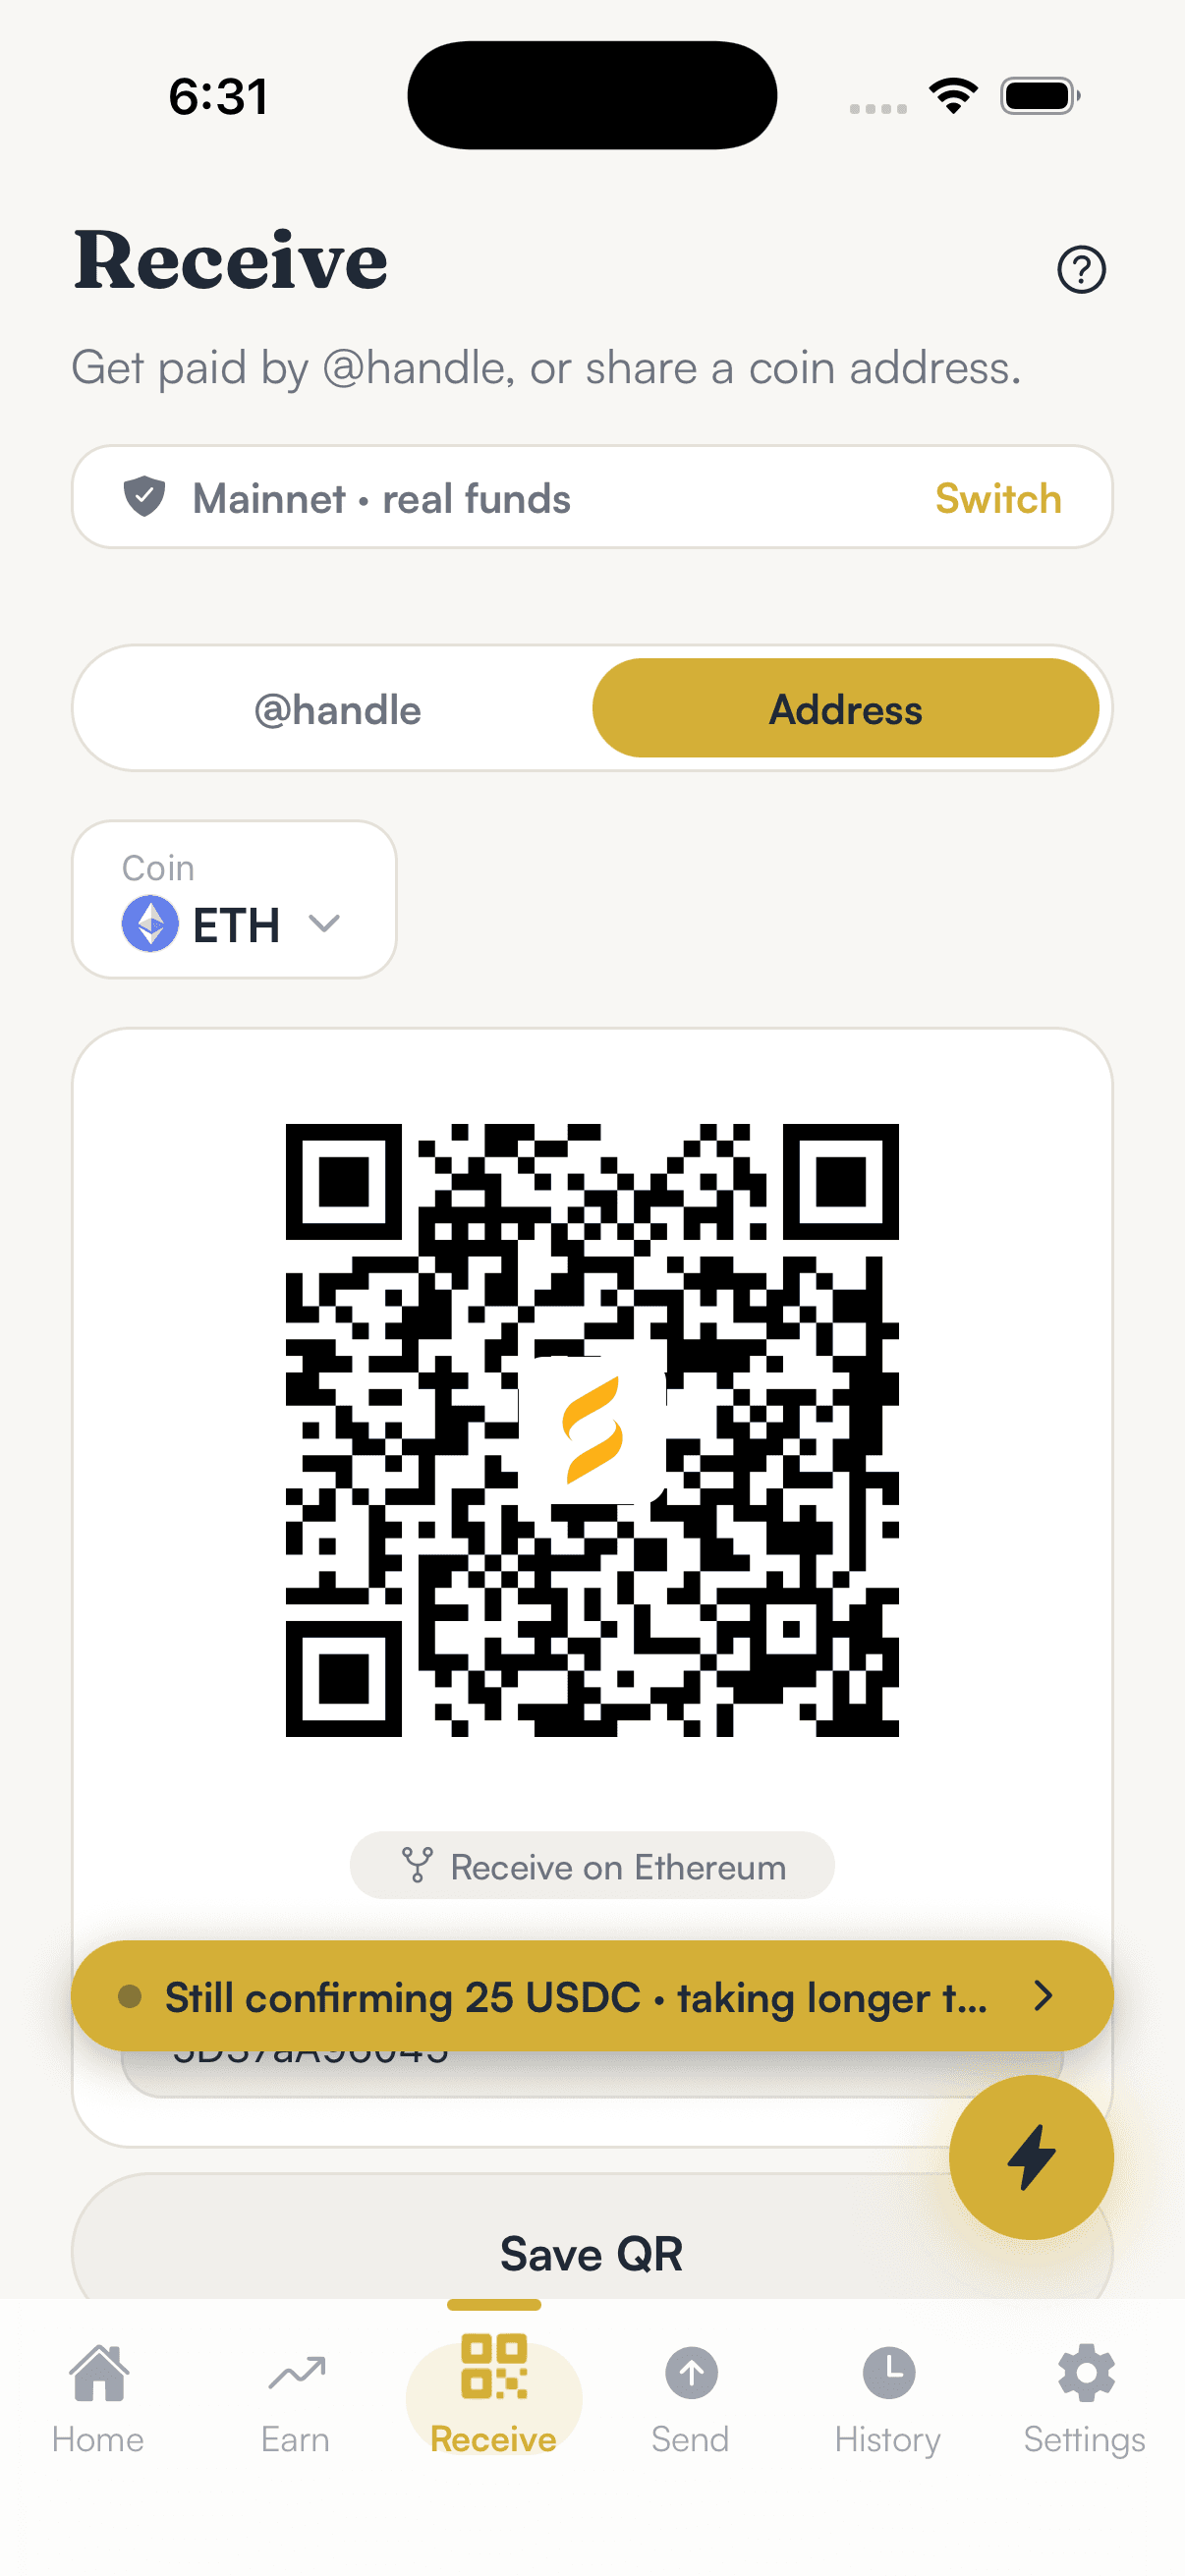
Receive on the XRP Ledger
The Receive screen shows the r-address for your account and, for RLUSD or USDC, offers to set up the trust line first. The same address then holds XRP and every issued currency you have a line for.
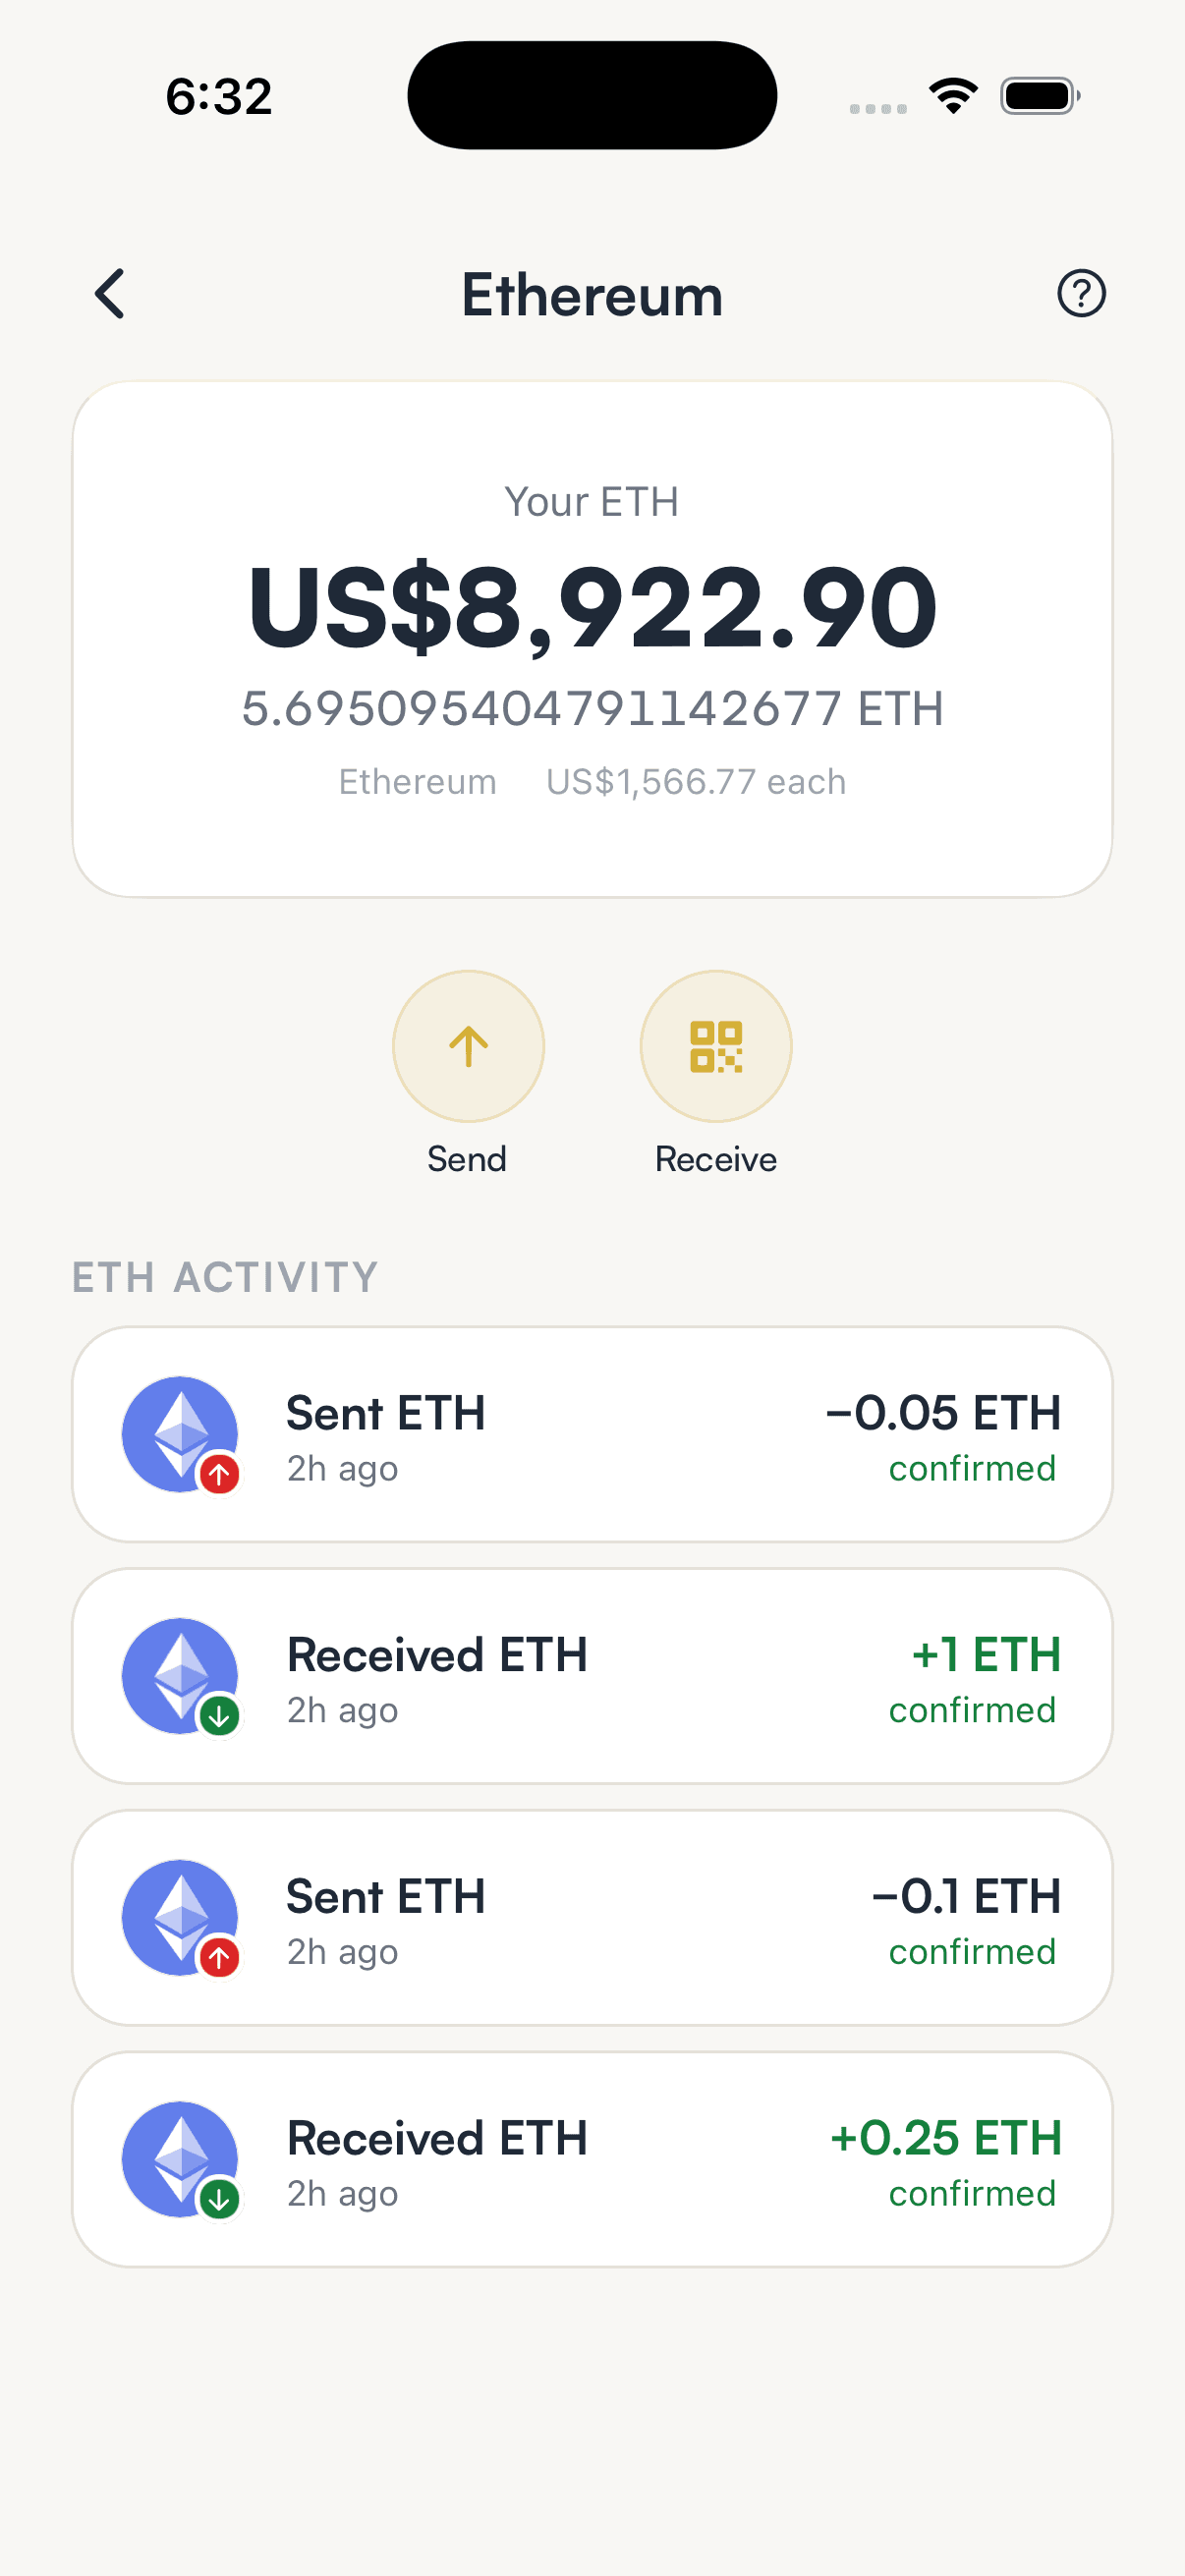
Check the asset before you send
Open the asset and the app shows what is spendable once the reserve is set aside, so a send cannot quietly fail.
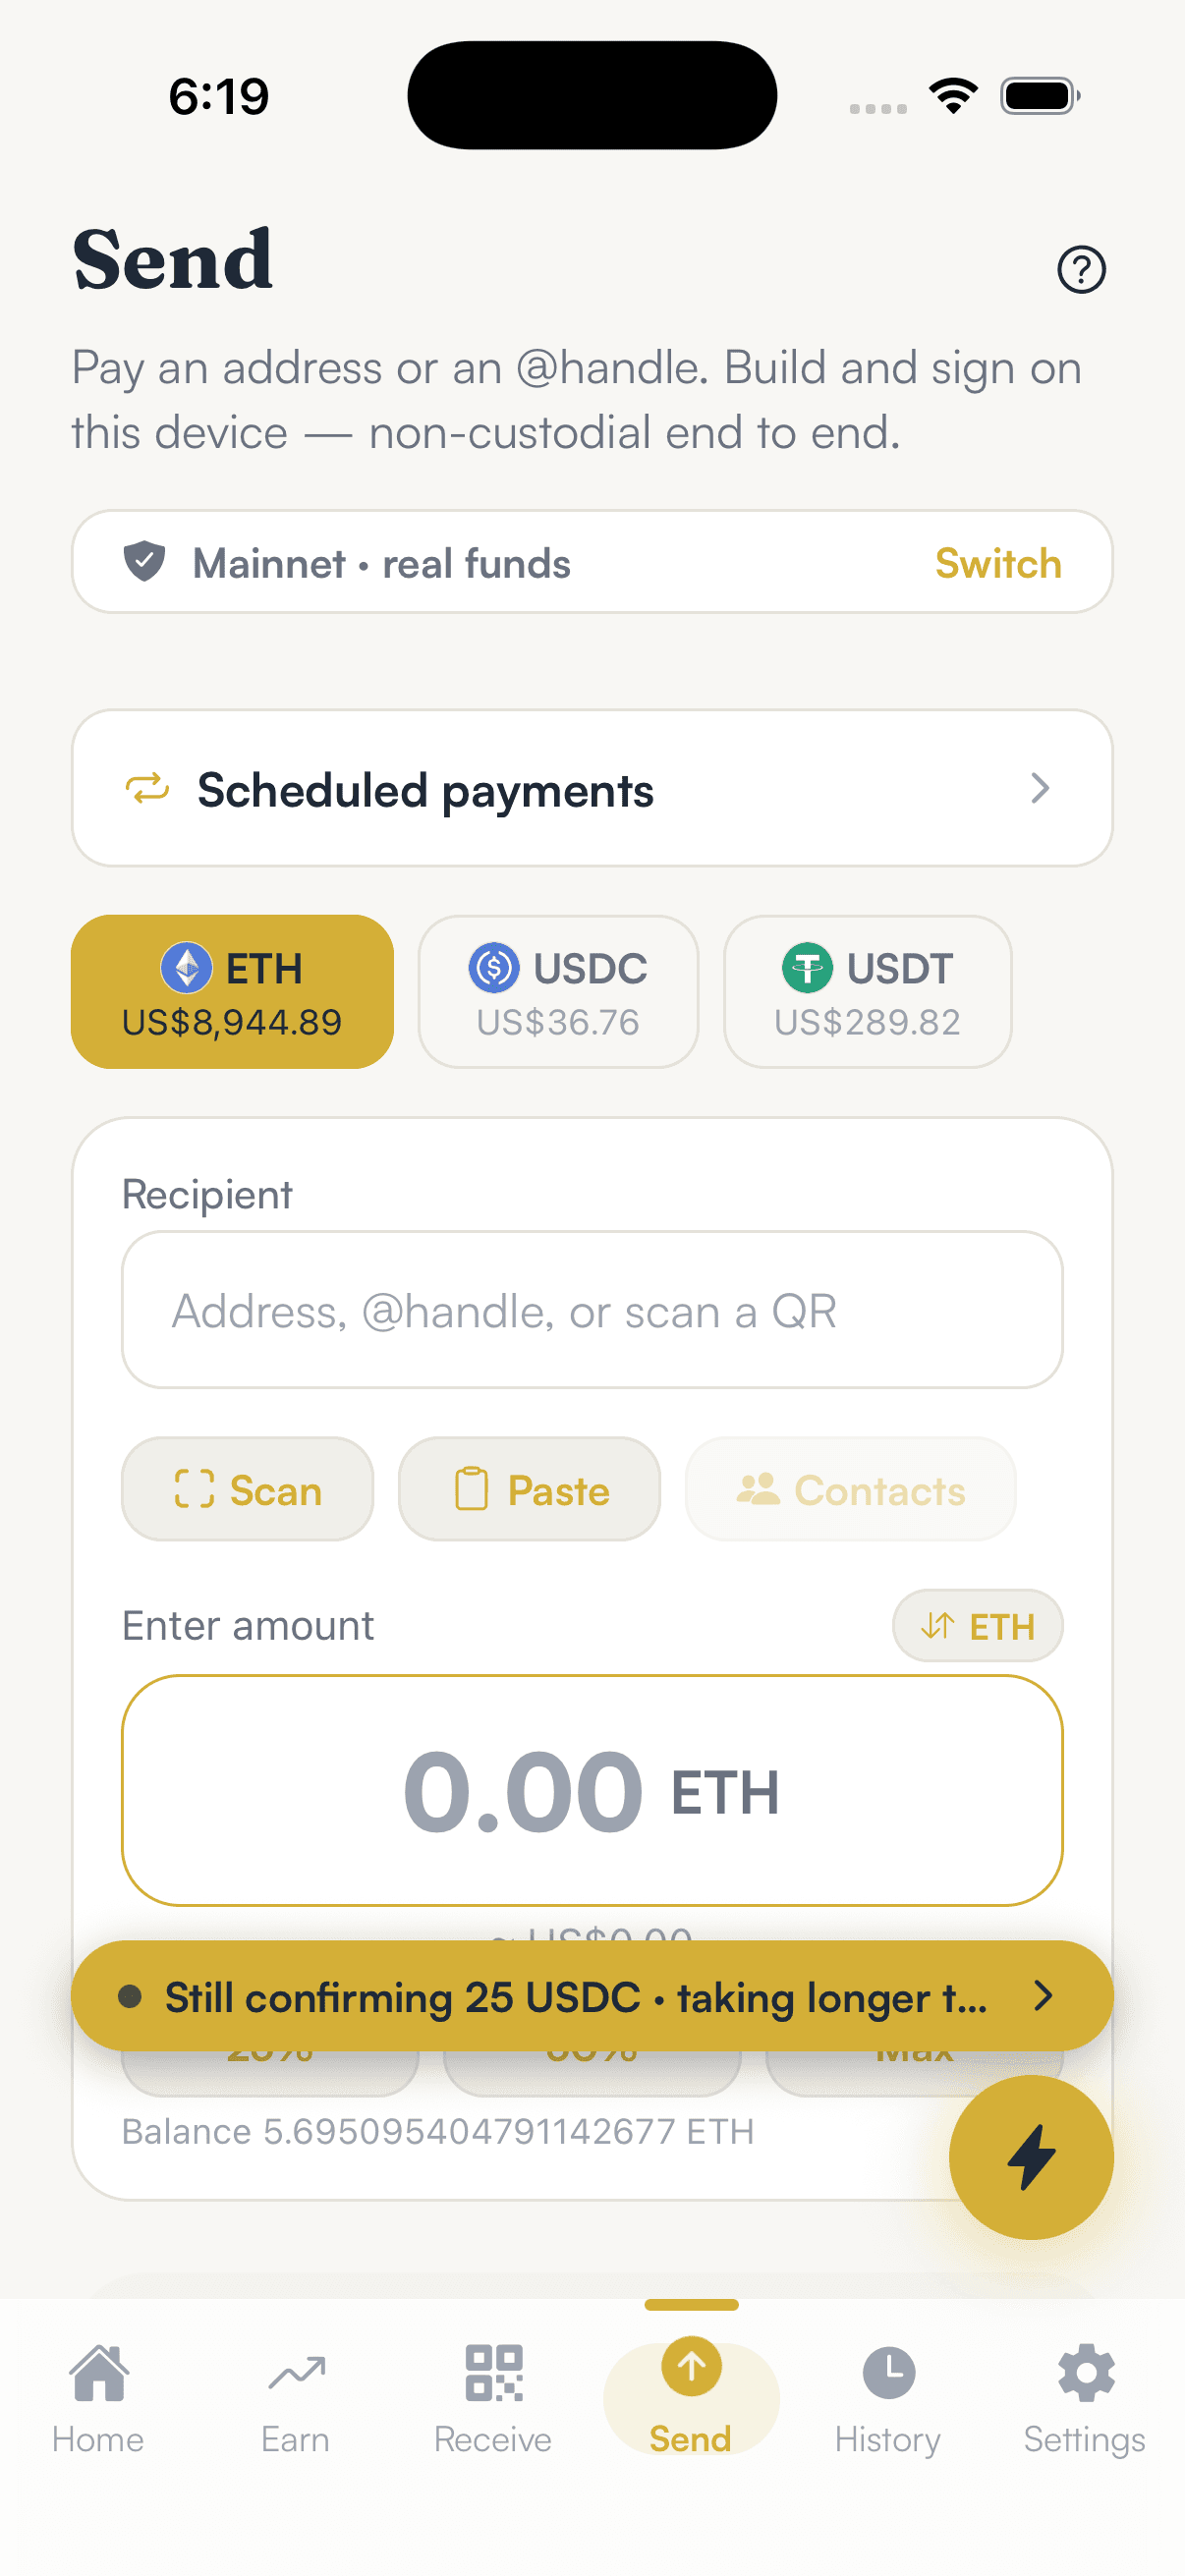
Send when you are ready
Pick the asset, enter the amount and review before signing on your own device.
Hold your own keys, keep the yield, skip the middleman.
SpendTheBits is a fully non-custodial wallet for 13 chains, free on iOS and Android.